

Adding client-derived constants to articles
Follow these steps to add content sent from the client to the server within articles.
About this task: This procedure sends information obtained on the client side (such as a username or account information) to the server to be integrated into knowledge base articles when they are displayed for a customer. It does this by calling the setInitializedEntities method for the Web API.
These values are constant for the life of the conversation and must be set when the widget is initialized or loaded. If you want values to be variables at run-time, see Adding client-derived variables to articles.
Steps:
-
In the Bold360 AI Console, create an article that contains
variables inside double square brackets. For example:
[[USER]] or [[ACCOUNT_NUMBER]]. Publish
the article so that it is available to your widget.
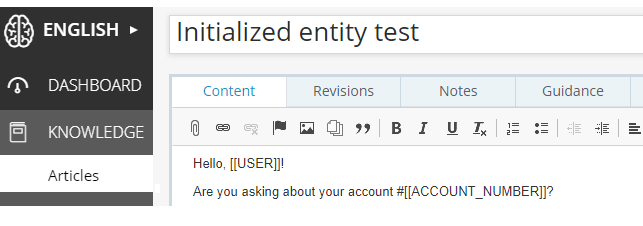
Note: The variables can be uppercase or lowercase, but they are case sensitive. The square brackets are important to indicate that these are evaluated later. -
Go to the setInitializedEntities method under the Widget Methods in the Bold360 AI Web
API & SDK reference.
Note: Notice that this method is only available to floating widgets running in "conversational" mode.
-
Copy the example setInitializedEntities code for the floating
widget.
nanorep.floatingWidget.on('load', function() { this.setInitializedEntities({ userName: 'John', role: 'customer' }); }); - Use an editor to open an HTML page that contains a floating widget.
- Paste the code into the <script> that initializes the floating widget. Typically, you would set initialized entities in the init event or the load event after obtaining them from a customer login, cookies, or other mechanism.
-
Modify the code to specify and define variables used in your article. For
example, the full contents of this <script> tag might look like this:
<script> nanorep.floatingWidget.on({ init: function() { this.setKB('1234567890'); } }); nanorep.floatingWidget.on('load', function() { this.setInitializedEntities({ USER: 'Chris', ACCOUNT_NUMBER: '012345678' }); }); </script> -
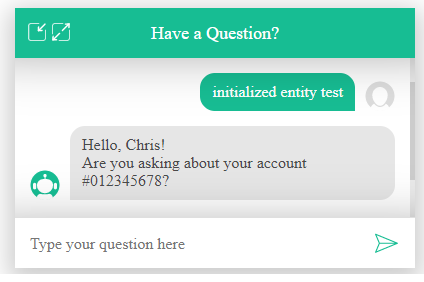
Test your web page. Remember to refresh the page and type
RESET in the widget to get the current behavior. Then type
the title of your article and select that option.
Note: The setInitializedEntities method must be called before the conversation is started; that is, before the widget calls the /api/widget/v1/cnf REST API. If the conversation is already started when the page is changed and refreshed, then changes to the setInitializedEntities method have no effect. Typing RESET in the widget causes the conversation to be restarted. -
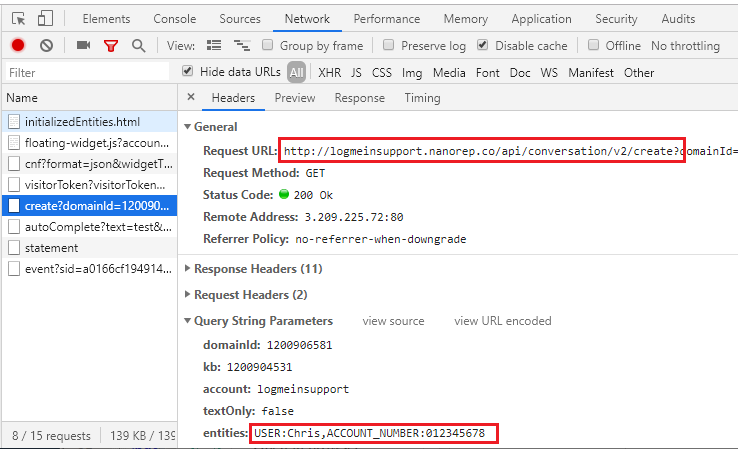
To see how initialized entities are passed to the server and used in the
article, open the Developer Tools (the Chrome tools are shown below, but other tools
are similar) and examine the following:
- Go to the Network page and select the Headers tab.
- In the list of API requests sent, select the create request. The Request URL shows that the /api/conversation/v2/create REST API was called. (Note: /api/conversation/v3/create API endpoint is in introduction phase.)
-
In the Query String Parameters, you'll see that the initialized
entities were sent to the server when the conversation between the
widget and the server was created.
- You can see that the values set in your web page are included in the Response from the server in the statement request, which called the /api/conversation/v1/statement REST API to handle a user statement in a conversation. (Note: /api/conversation/v2/statement API endpoint is in introduction phase.)